Top 5 Reasons DIY Painting Fails (And What to Do Instead)

For many homeowners, picking up a roller seems like a weekend win. But by Monday morning, what looked like a cost-saving project often reveals patchy coverage, peeling edges, or a color that looked great on the chip but wrong on the wall. DIY painting fails for predictable—yet fixable—reasons. Here are the five most common.

1. Skipping Proper Surface Preparation

This is the silent killer of most DIY paint jobs. Dirty walls, flaking paint, or glossy finishes left untouched will all prevent new paint from bonding properly.

What goes wrong:

  • Paint peels, bubbles, or cracks prematurely

  • Uneven absorption causes patchy areas

  • Imperfections show through the top coat

What to do instead:
Clean surfaces thoroughly, fill holes or cracks, sand shiny areas, and prime where needed. Prep can take longer than painting—but it’s non-negotiable if you want a professional result.


2. Choosing the Wrong Paint or Finish

Not all paints are created equal, and choosing a paint based solely on color or price is a rookie error.

What goes wrong:

  • Matte paint in a bathroom leads to mold

  • High-gloss on uneven walls highlights flaws

  • Cheap paint requires more coats and wears faster

What to do instead:
Select products based on use, not just looks. Kitchens and bathrooms need moisture-resistant, washable paints. Ceilings demand flat finishes. Always use high-quality paint—it saves time and frustration in the long run.


3. Inconsistent Technique and Tools

Brush streaks. Roller marks. Missed corners. These aren’t signs of “character”—they’re signs of the wrong tools or rushed application.

What goes wrong:

  • Uneven coverage

  • Visible lines between sections

  • Paint overlap marks or sagging drips

What to do instead:
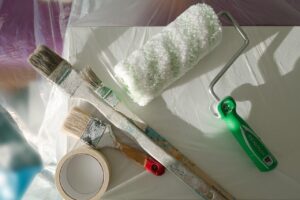
Use the right tool for the job: synthetic brushes for latex, quality rollers for smooth finishes. Apply paint in consistent strokes, keep a wet edge, and maintain a steady pace across walls. Avoid overloading your brush or roller.


4. Ignoring Environmental Conditions

Paint reacts to temperature and humidity. If you paint on a rainy day or in a poorly ventilated room, expect trouble.

What goes wrong:

  • Extended dry time

  • Tackiness or dust adhesion

  • Paint failure over time

What to do instead:
Follow the paint manufacturer’s recommendations for temperature and drying time. In Edmonton, it’s especially important to paint during dry, mild weather and allow ample ventilation indoors.


5. Poor Planning and Rushing the Job

DIYers often underestimate time and overestimate ability. Skipping steps to save time usually means redoing the entire job.

What goes wrong:

  • Missed spots

  • Mismatched colors from batch to batch

  • Burnout leads to sloppy finishing

What to do instead:
Break the job into stages: prep, prime, first coat, second coat, and cleanup. Don’t try to paint an entire house in one day. And if it feels like too much—it probably is. Calling a professional may cost more upfront, but it saves stress and materials in the long run.

Final thought

DIY painting isn’t doomed to fail—but it’s not as simple as it seems. Most failed paint jobs come down to skipped steps, wrong tools, or rushing the process. If you’re not confident in your prep or your technique, consider working with a qualified house painter in Edmonton. You’ll save time, avoid costly redos, and get a finish that truly lasts.

5 Top Color Schemes

Top 5 Colour Schemes for Modern Commercial Interiors

Choosing the right colour scheme for your commercial interior isn’t about trends—it’s about function, brand identity, and client perception. Here are 5 curated colour combinations that work beautifully in modern Edmonton offices and commercial spaces.

Read More »

© Leonard's Painting Edmonton, 2024. All Rights Reserved.